Standalone or CAPsMAN deployement
This set up is a single AP connected to a router, in our case a hEX. The management of the AP is the same as the LAN the clients will connected to as this is based on a simple home deployment. For the LAN we have a bridge configured called lan_bridge with an IP of 192.168.124.1/24 and includes a DHCP server too.
The AP we are using is an Wi-Fi 6/AX AP however if using an earlier technology such as AC then that would need to be adjusted when it comes to the channel profiles.
CAPsMAN
Note: These settings have changed since the advent of RotuerOSv7. The firmware version these steps are based on is 7.16+ so make sure you’re running the latest sable version of firmware.
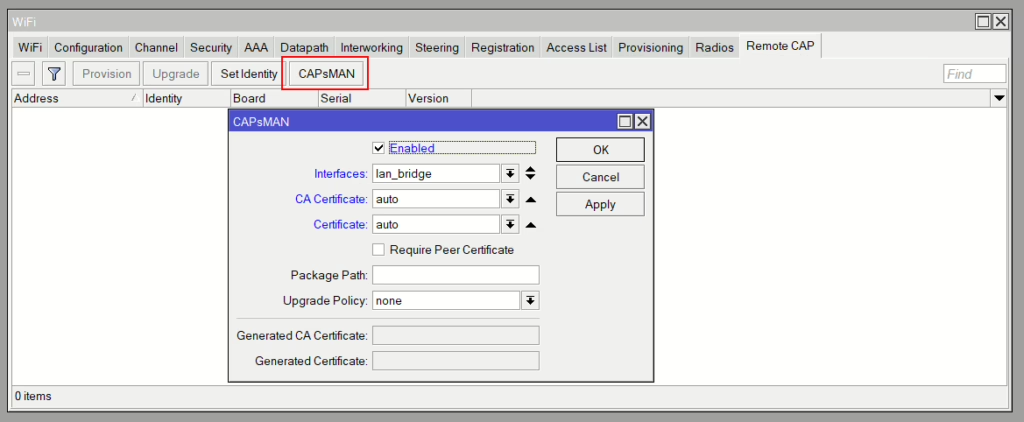
On the router, navigate to WiFi and then the last tab called Remote CAP. Click on CAPsMAN and then click Enabled, select your LAN interface which the AP will be discoverable on (in our case our LAN bridge) and select auto for both Certificates.
Enable the CAPsMAN Server
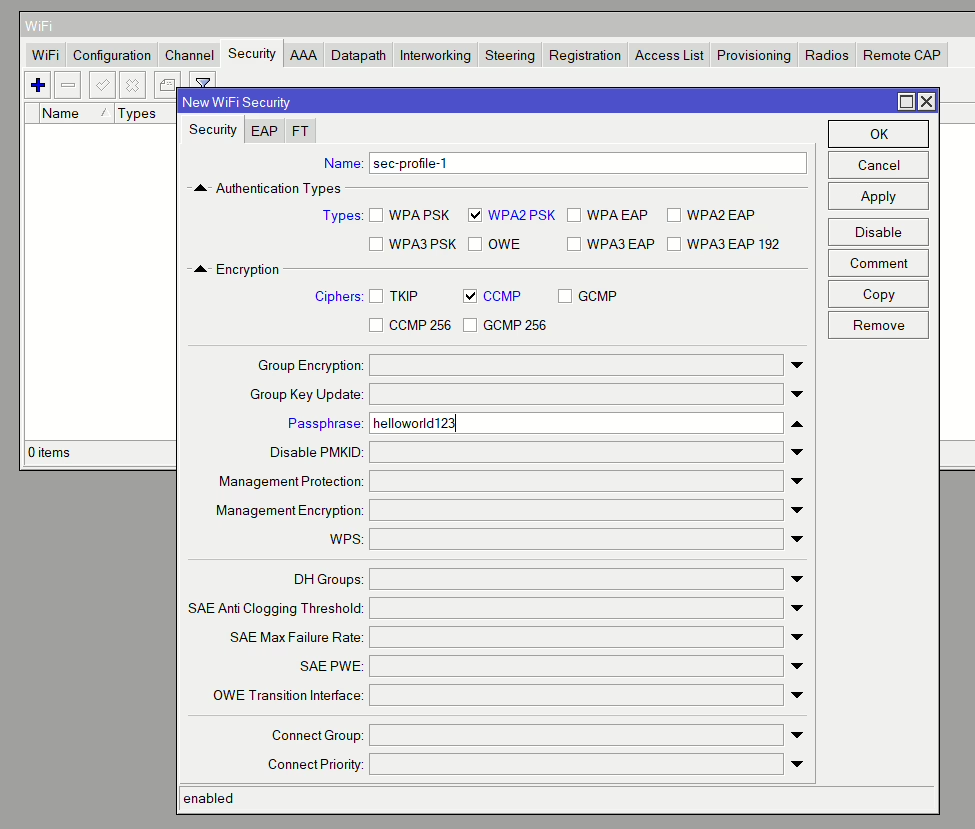
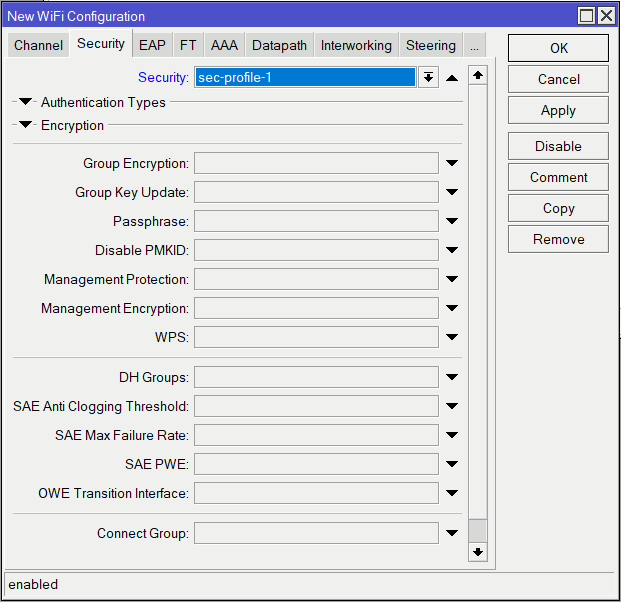
Security Profile
For a simple PSK setup we will use WPA2 PSK/CCMP and choose our PSK/passphrase.
Channel
For a detailed look at channel frequencies click here: https://mikrotikmasters.com/2-4ghz-vs-5ghz-wifi/
This next step would be best done via the CLI so using a Terminal where by you can copy and paste the commands provided. The idea is to populate with every usable channel on both spectrums then easily select them as part of the AP provisioning.
Within 2.4GHz the only 3 channels we can use to avoid overlapping are 1, 6 & 11, which are frequencies 2412, 2437 & 2462 MHz. To allow the MikroTIk to choose best one based on the other signals it can see, we can add all 3 in a single channel profile and select that as our channel. This prevents propogating on a non-standard frequency.
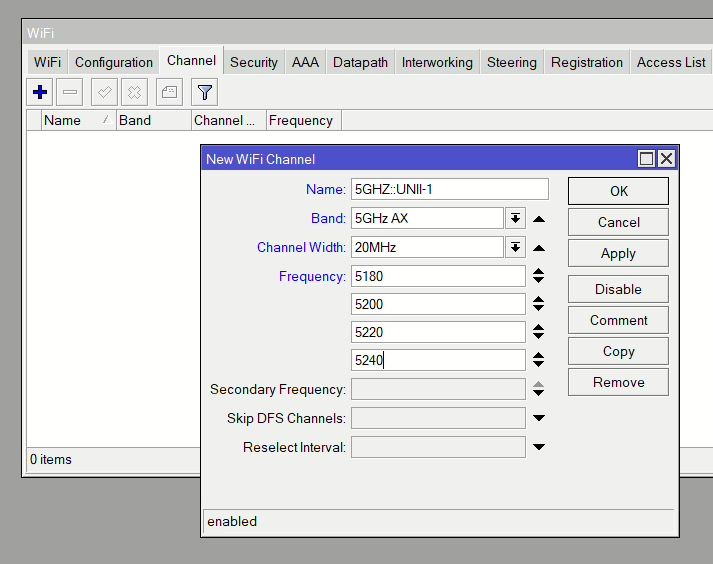
Likewise with 5Ghz, we have 2 sections of the band to use known as UNII-1 & UNII-3. These avoid using any non standard and DFS channels. We can either specify the frequency we want or again allow the MikroTik to choose based on the list we give it in the profile.
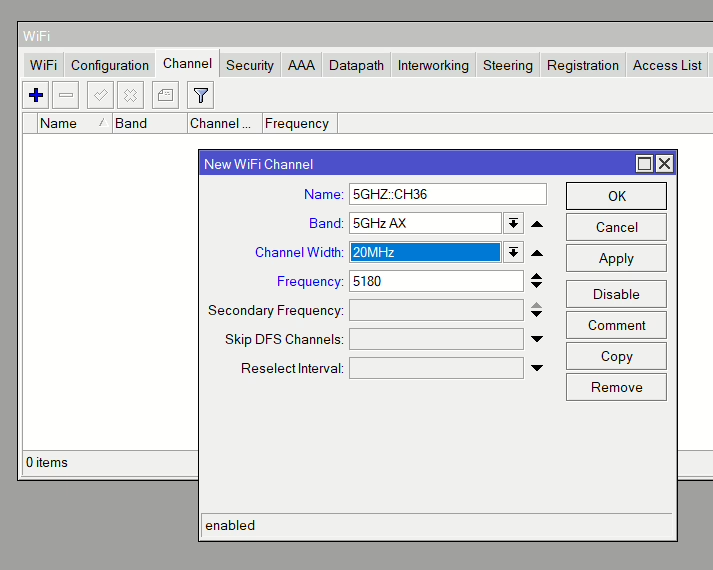
For example, a single channel (Channel 36 – 5180MHz) can be created like this:
Or a range within the UNII-1 part of the spectrum like this.
How if we use the below commands we can populate all channels and ranges for both spectrums
Individual 5GHz UNII-1 channels
/interface wifi channel
add band=5ghz-ax frequency=5180 name=5GHZ::CH36 width=20mhz
add band=5ghz-ax frequency=5200 name=5GHZ::CH40 width=20mhz
add band=5ghz-ax frequency=5220 name=5GHZ::CH44 width=20mhz
add band=5ghz-ax frequency=5240 name=5GHZ::CH48 width=20mhz
Individual 5GHz UNII-3 channels
/interface wifi channel
add band=5ghz-ax frequency=5745 name=5GHZ::CH149 width=20mhz
add band=5ghz-ax frequency=5765 name=5GHZ::CH153 width=20mhz
add band=5ghz-ax frequency=5785 name=5GHZ::CH157 width=20mhz
add band=5ghz-ax frequency=5805 name=5GHZ::CH161 width=20mhz
add band=5ghz-ax frequency=5825 name=5GHZ::CH165 width=20mhz
Full 5GHz Ranges (UNII-1, UNII-3 & Combined)
/interface wifi channel
add band=5ghz-ax disabled=no frequency=5180,5200,5220,5240 name=5GHZ::UNII-1 width=20mhz
add band=5ghz-ax disabled=no frequency=5745,5765,5785,5805,5825 name=5GHZ::UNII-3 width=20mhz
add band=5ghz-ax disabled=no frequency=5180,5200,5220,5240,5745,5765,5785,5805,5825 name=5GHZ::NON-DFS width=20mhz
Individual 2.4GHz channels
/interface wifi channel
add band=2ghz-ax frequency=2412 name=2GHZ::CH1 width=20mhz
add band=2ghz-ax frequency=2437 name=2GHZ::CH6 width=20mhz
add band=2ghz-ax frequency=2462 name=2GHZ::CH11 width=20mhz
Full 2.4GHz Range
/interface wifi channel
add band=2ghz-ax disabled=no frequency=2412,2437,2462 name=2GHZ::AUTO width=20mhz
Complete List
/interface wifi channel
add band=5ghz-ax frequency=5180 name=5GHZ::CH36 width=20mhz
add band=5ghz-ax frequency=5200 name=5GHZ::CH40 width=20mhz
add band=5ghz-ax frequency=5220 name=5GHZ::CH44 width=20mhz
add band=5ghz-ax frequency=5240 name=5GHZ::CH48 width=20mhz

add band=5ghz-ax frequency=5745 name=5GHZ::CH149 width=20mhz
add band=5ghz-ax frequency=5765 name=5GHZ::CH153 width=20mhz
add band=5ghz-ax frequency=5785 name=5GHZ::CH157 width=20mhz
add band=5ghz-ax frequency=5805 name=5GHZ::CH161 width=20mhz
add band=5ghz-ax frequency=5825 name=5GHZ::CH165 width=20mhz

add band=5ghz-ax disabled=no frequency=5180,5200,5220,5240 name=5GHZ::UNII-1 width=20mhz
add band=5ghz-ax disabled=no frequency=5745,5765,5785,5805,5825 name=5GHZ::UNII-3 width=20mhz
add band=5ghz-ax disabled=no frequency=5180,5200,5220,5240,5745,5765,5785,5805,5825 name=5GHZ::NON-DFS width=20mhz

add band=2ghz-ax frequency=2412 name=2GHZ::CH1 width=20mhz
add band=2ghz-ax frequency=2437 name=2GHZ::CH6 width=20mhz
add band=2ghz-ax frequency=2462 name=2GHZ::CH11 width=20mhz

add band=2ghz-ax disabled=no frequency=2412,2437,2462 name=2GHZ::AUTO width=20mhz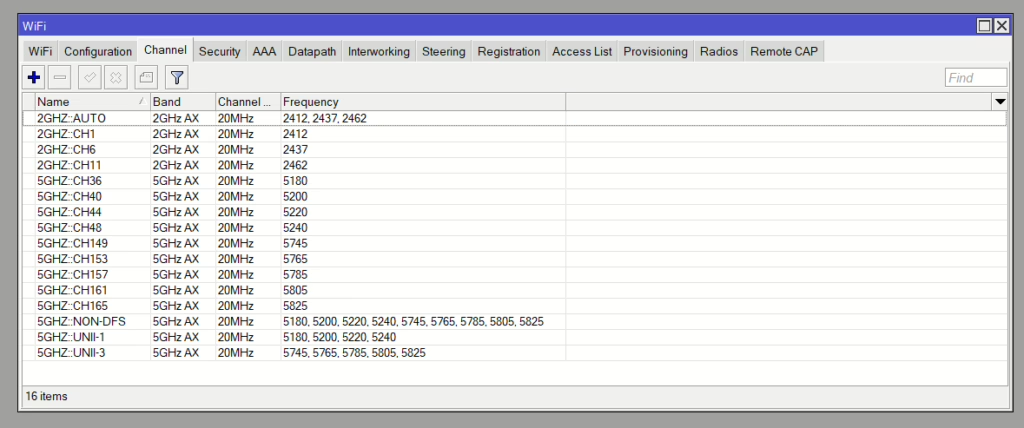
Configuration
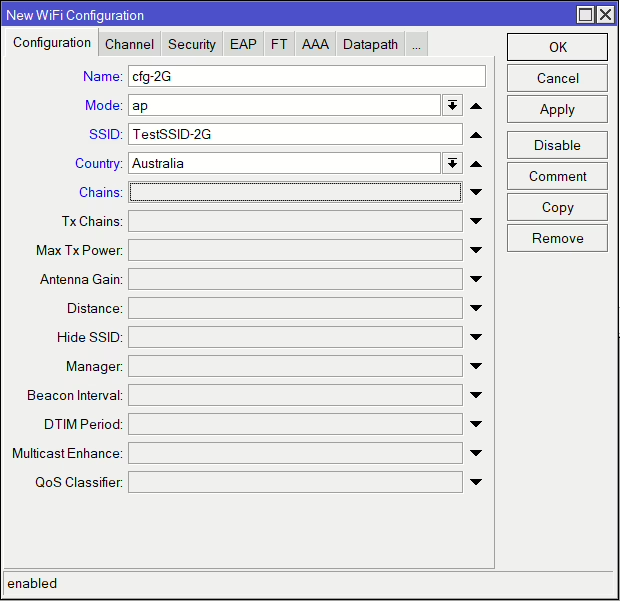
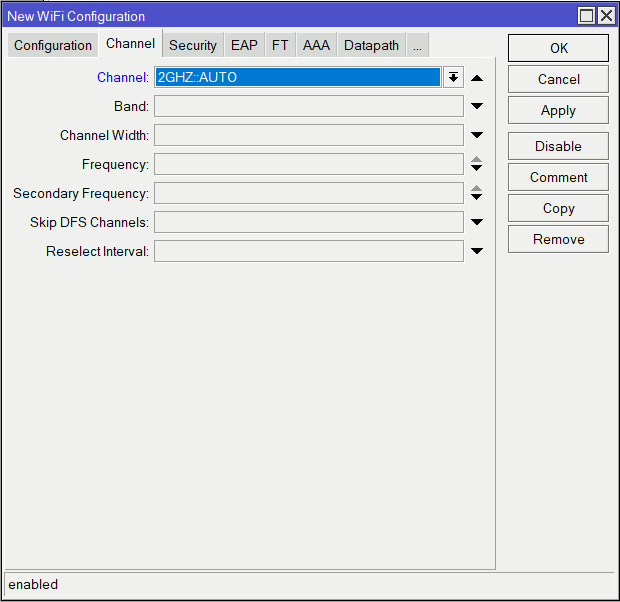
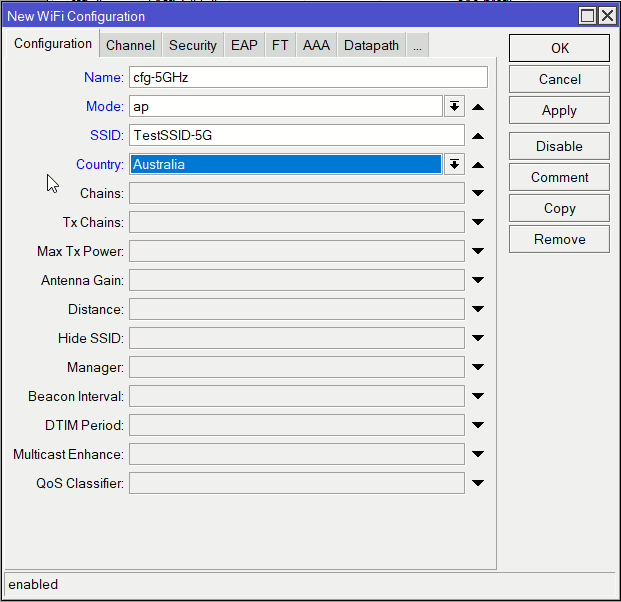
Now we connect all those together in 2 separate Configuration profiles, one for 2.4Ghz and one for 5GHz.
We give it a unique name based on the frequency, select Mode as ap and set our SSID (I recommend having separate names of each band), and our Country.
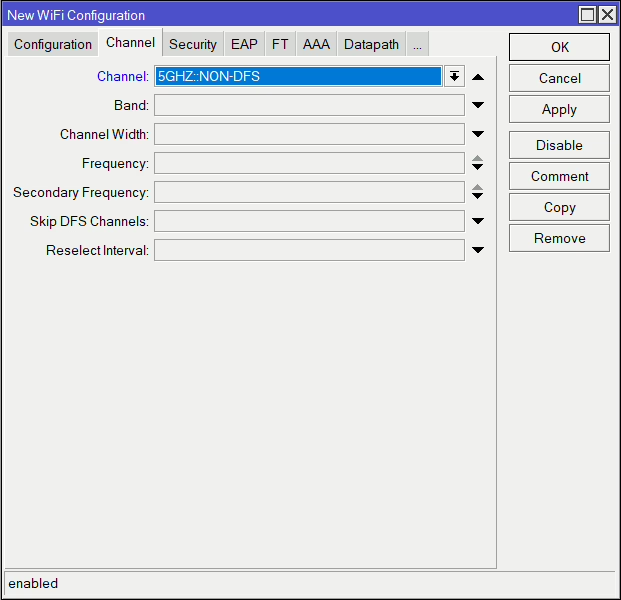
Then one the Channel, Security and Datapath we select the profiles created above. For the channel, unless it is a requirement to statically set the channel, select the relevant range we set before
2.4GHz
5GHz

cAP configuration
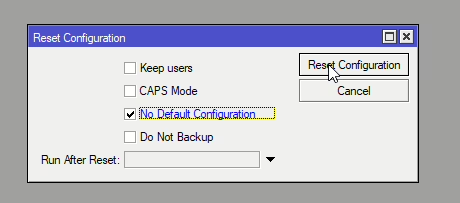
This can be any MikroTik AP (cAP) or router with a WIFI interface. The for simplicity, let’s start with a blank config. If it’s a new AP/device, make sure when first logging in you remove default configuration, or go to System > Reset Configuration and check No Defualt Configuration:
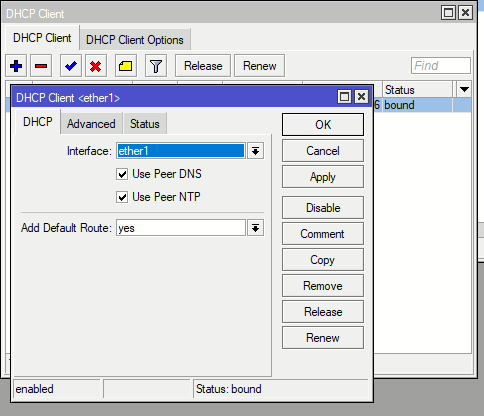
Once back into the device, add a DHCP client to your uplink interface (this could be a bridge if using a router and using the ports to connect to wired devices). In our case ether1 is connecting to our router:
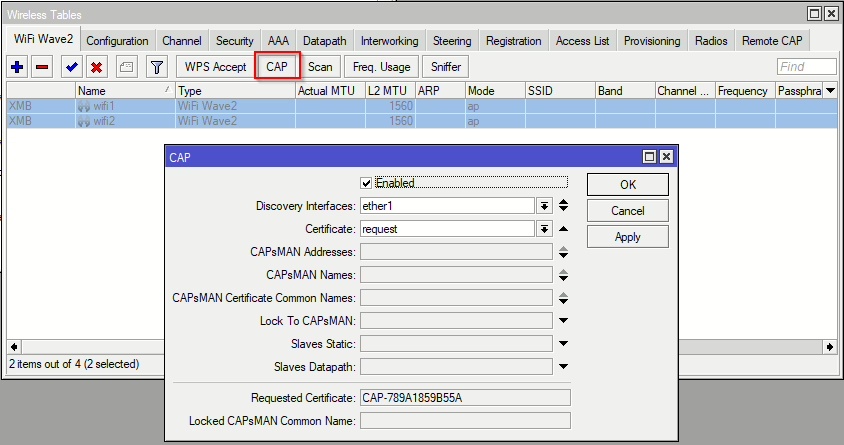
Now open the Wireless/WiFi menu and click the CAP button. Enable and select the interface connecting to your router (interface or bridge), then also select request for the Certificate.
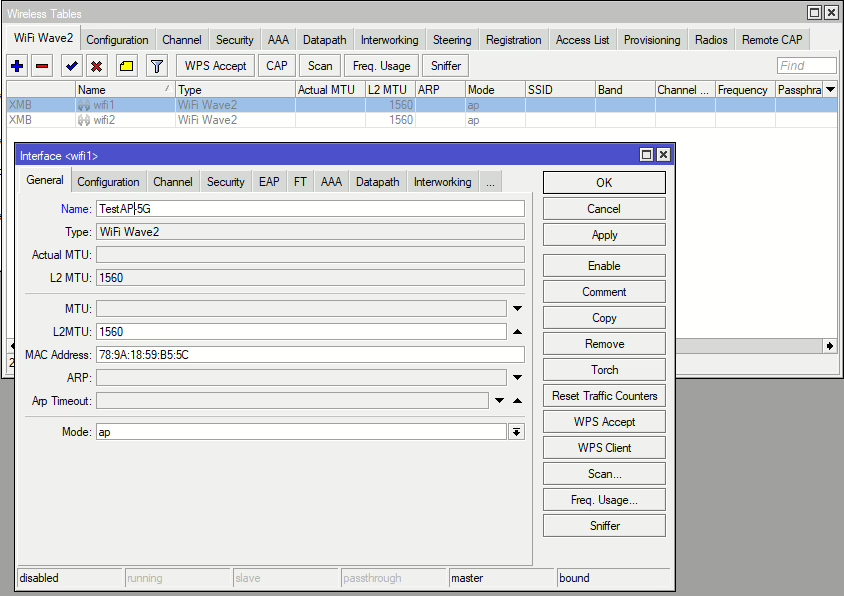
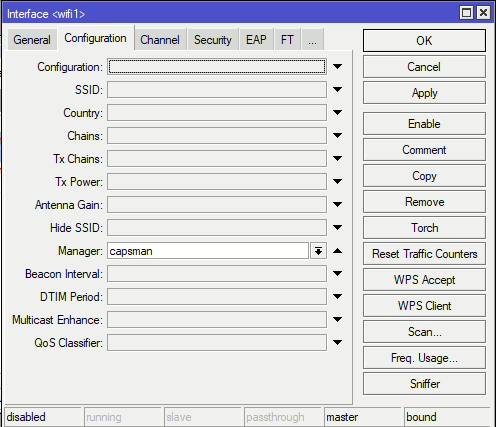
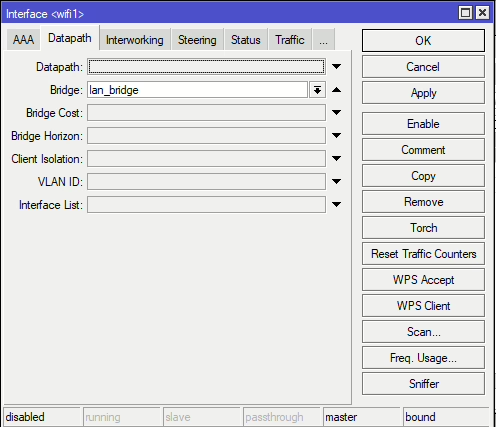
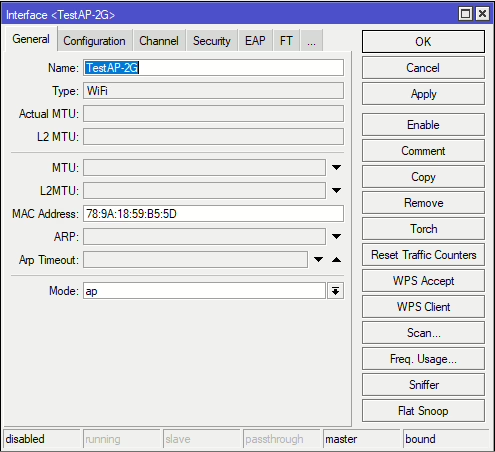
Now configure each interface. For best practice rename the interface to something identifiable such as the device and the frequency of the particular WIFI interface, such as TestAP-5G. Then on then Configuration tab, set the Manager to capsman. Then to specify the network for the SSID data (user data), under the Datapath tab select the LAN bridge.
cAP Authorisation
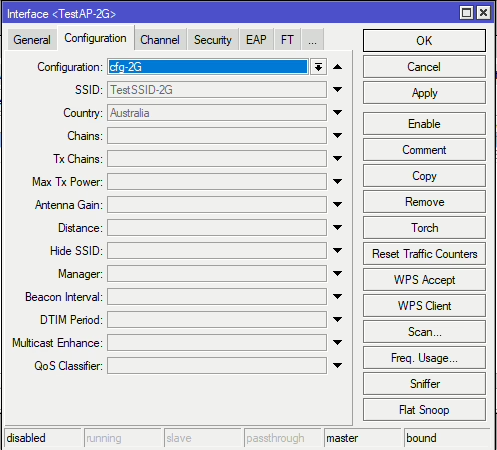
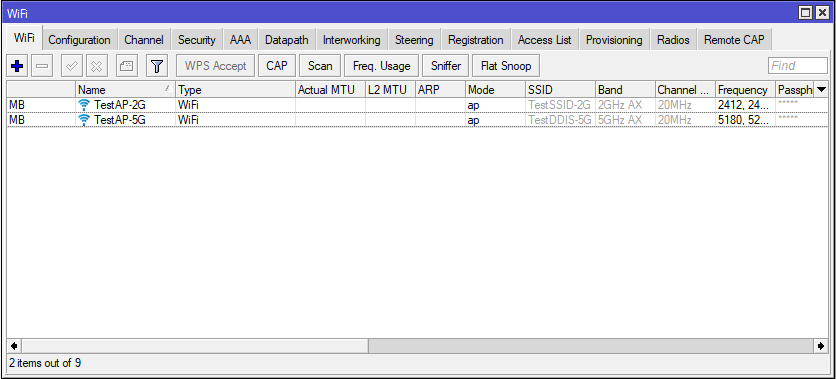
Now back on the router (CAPsMAN) Manager/Controller, you’ll see the interfaces now appear. Click on each one and give it a unique name such as device name + frequency, and then on the Configuration tab select the correct config profile (2 or 5G).
Then simply enable both interfaces.
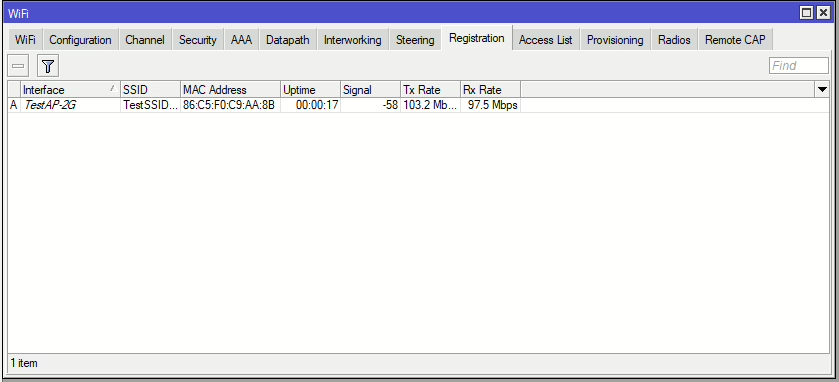
Connected clients can now be viewed from the Registration Tab (for all APs if using multiple)