Deploying a MikroTik CHR in AWS can have many use cases including creating a IKEV2 VPN server
Stages 1: Deploy AWS instance of the MikroTik CHR
Here’s a step-by-step guide to setting up an AWS account and launching a free-tier EC2 instance of MikroTik CHR, including configuring a custom security group to allow TCP port 8291 for Winbox:
1. Set Up an AWS Account
- Go to AWS Signup.
- Click Create an AWS Account.
- Enter your email, choose a password, and create a unique account name.
- Provide your billing details (a credit/debit card is required, but you won’t be charged for free-tier usage).
- Confirm your account via email and complete the identity verification process.
2. Launch an EC2 Instance
- Log in to the AWS Management Console.
- Navigate to the EC2 Dashboard by searching for “EC2” in the AWS services search bar.
- Click Launch Instances.
3. Configure Instance Details
- Choose an Amazon Machine Image (AMI):
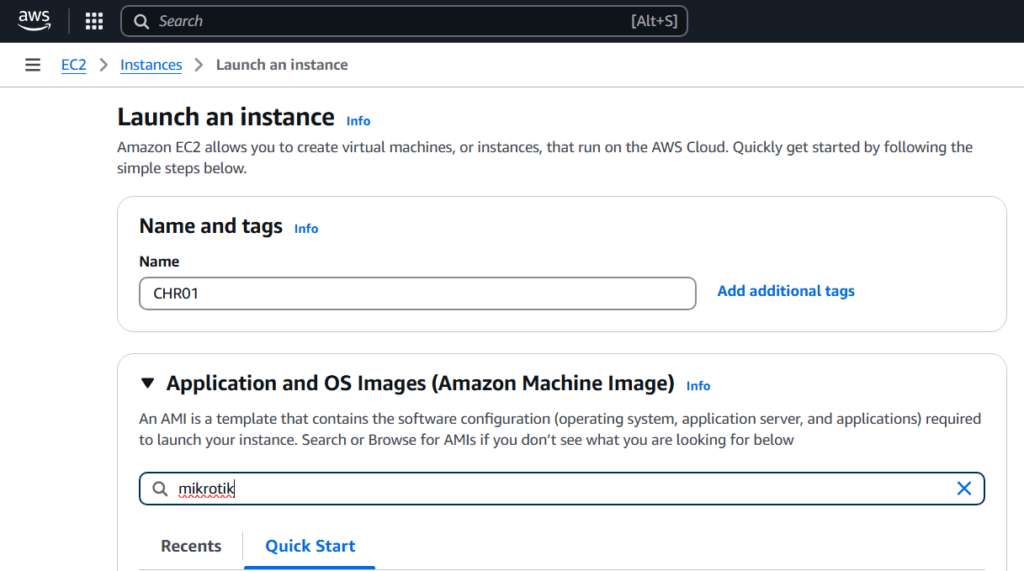
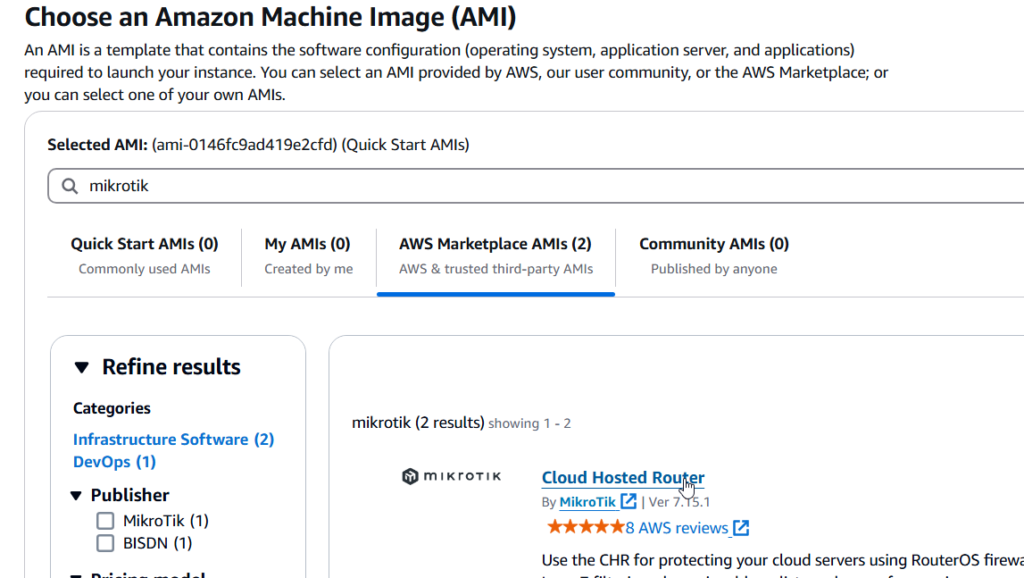
- MikroTik CHR is officially available on the AWS Marketplace. Search in the textbox for “mikrotik”


- Choose an Instance Type:
- Select t2.micro (free-tier eligible).
- Configure Instance Settings:
- Leave all default settings unless specific configurations are required.
- Add Storage:
- Allocate the recommended storage size for CHR (at least 1 GB).
4. Configure the Security Group
- Under Configure Security Group, select Create a new security group.
- Add the following rules:
- Disable SSH (TCP): Port 22, Source:
0.0.0.0/0(or restrict it to your IP for security). - Custom TCP Rule:
- Protocol: TCP
- Port Range: 8291
- Source:
0.0.0.0/0(or preferably restrict to your IP).
- Disable SSH (TCP): Port 22, Source:
- Click Review and Launch.
5. Launch the Instance
- Click Launch.
- Create a new key pair (or use an existing one):
- Name the key pair and download the
.pemfile (keep this secure; you’ll need it to access the instance via SSH).
- Name the key pair and download the
- Confirm and click Launch Instances.
6. Connect to Your Instance
- Navigate to the Instances tab in the EC2 dashboard.
- Copy the Public IPv4 Address of your instance.
- Use Winbox to connect:
- In Winbox, enter the Public IP of the EC2 instance and set the port to 8291.
7. Verify and Configure MikroTik CHR
- Log in to MikroTik using Winbox.
- Set up basic configurations like username, password, and firewall rules to secure your CHR.
8. Additional Steps
- Ensure proper configuration of AWS security rules and MikroTik firewall settings.
- Monitor usage to ensure it remains within the free tier limits.
You now have a running MikroTik CHR instance on AWS, accessible via Winbox! Let me know if you need assistance with any specific configurations.
Stage 2: MikroTik Licensing
Here’s an extended guide covering how to enable the free two-week MikroTik CHR license, the cost and types of licenses, and deployment options:
1. Enable the Two-Week Free MikroTik CHR License
Once your MikroTik CHR is up and running on your AWS EC2 instance:
- Connect to the CHR via Winbox:
- Use the public IP address of your instance and the TCP port 8291 (set earlier).
- The default username is
admin, and the password field is empty.
- Activate the Free License:
- Navigate to System > License in the Winbox menu.
- In the License menu, you’ll see the Trial license option.
- Click Activate Trial to enable a free two-week trial license.
- The trial license provides full functionality for 14 days.
2. MikroTik CHR License Types and Costs
MikroTik Cloud Hosted Router (CHR) has several license levels. The costs and features differ based on throughput limits:
- License Types:
| License Type | Throughput Limit | Cost (USD) | Cost (AUD) | Cost (GBP) | Ideal Use Case |
|---|---|---|---|---|---|
| Free | 1 Mbps | Free | Free | Free | Testing or very small-scale use. |
| P1 | 1 Gbps | $45 | ~AUD 70 | ~GBP 35 | Small businesses or moderate workloads. |
| P10 | 10 Gbps | $95 | ~AUD 148 | ~GBP 74 | High-performance requirements. |
| P-Unlimited | Unlimited | $250 | ~AUD 390 | ~GBP 195 | Enterprise-level or heavy traffic scenarios. |
Note: Currency conversions are approximate and may vary depending on the exchange rate and payment method. Always check with your payment processor for the exact amount. Let me know if you’d like further refinements!
- Cost and Payment:
- Licenses are perpetual (one-time purchase).
- Payments are made through MikroTik’s website or using the built-in license management in CHR.
3. Ways to Deploy and Upgrade CHR Licenses
Once your trial period ends, you’ll need to purchase a license for continued functionality. Follow these steps to upgrade your license:
- Upgrading the License:
- In Winbox, go to System > License.
- Click Change License Key.
- Log in to your MikroTik account (or create one at MikroTik’s Account System).
- Purchase the desired license type.
- Copy the license key into the Change License Key dialog in Winbox.
- Click OK, and the system will apply the license.
- Payment Methods:
- Pay through MikroTik’s official site using a credit card or PayPal.
- Licenses are tied to the CHR’s software ID (found in the license menu).
4. Deployment Options for CHR Licenses
MikroTik CHR can be deployed in various environments, not just AWS. Here are some common deployment options:
- Cloud Platforms:
- AWS EC2: Pay for the instance and bandwidth separately; license costs are one-time.
- Microsoft Azure: Similar process to AWS; upload the CHR VHD and configure.
- Google Cloud Platform: Use the image import feature for CHR.
- On-Premise Virtualization:
- VMware ESXi: Deploy using the OVA/ISO file.
- Hyper-V: Use the VHD image.
- Proxmox or KVM: Supported via RAW or QCOW2 images.
- Hosted Virtual Machines:
- Deploy CHR on services like DigitalOcean or Linode using custom images.
5. Ongoing Costs
- AWS Costs:
- EC2 Instance: Free if you stay within the free-tier limits (e.g., t2.micro).
- Storage: Up to 30 GB under free tier (typically, CHR needs much less).
- Bandwidth: AWS charges for outbound traffic exceeding the free tier (1 GB/month free).
- MikroTik License Cost:
- One-time license fee as outlined above.
- Optional Costs:
- Additional storage, higher instance types, or extra AWS features incur extra charges.
You’re now equipped to use MikroTik CHR with a trial license and understand how to manage licenses and associated costs. Let me know if you need further guidance!


