

Introduction: What Is WireGuard?
WireGuard is a modern, efficient, and highly secure VPN (Virtual Private Network) protocol designed to simplify the complexities of traditional VPNs like L2TP/IPsec. It boasts lightweight architecture, faster performance, and seamless encryption, making it a popular choice for secure communication.
Key Benefits of WireGuard:
- Speed: Offers significantly faster performance compared to traditional VPN protocols.
- Simplicity: Designed with minimal code for easier implementation and auditing.
- Security: Employs state-of-the-art cryptography to ensure robust security.
- Cross-Platform: Works across multiple operating systems, including Linux, Windows, macOS, and mobile devices.
In this guide, we’ll walk you through setting up WireGuard on your MikroTik router.
Prerequisites
Before starting, ensure you have the following:
- A MikroTik router running RouterOS version 7.1 or later (WireGuard is not supported on earlier versions).
Step 1: Enable WireGuard Interface
- Create a new WireGuard interface and give it a name, leaving the rest default (optional to change Listen Port if required)
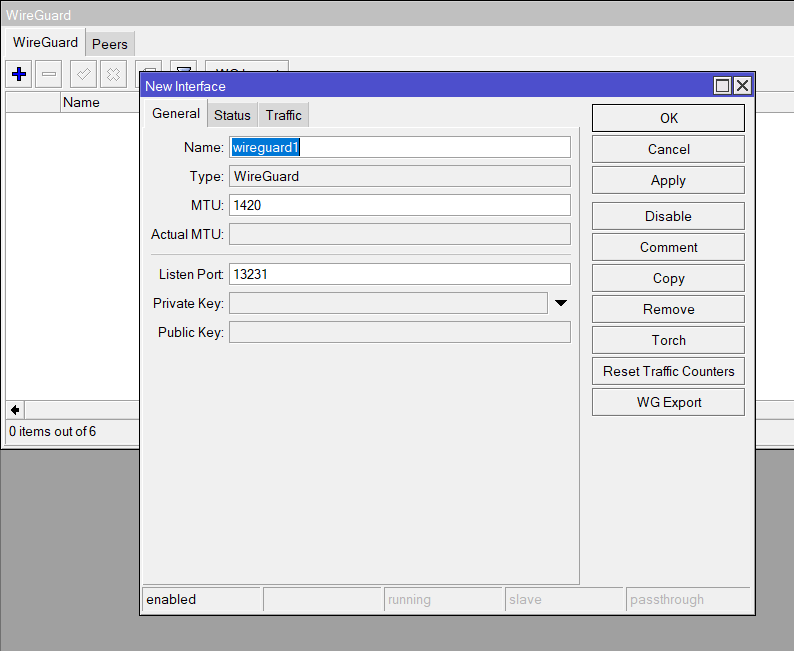
/interface/wireguard add name=wireguard1
Step 3: Configure the WireGuard Interface IP Address
- Assign an IP address to the WireGuard interface:
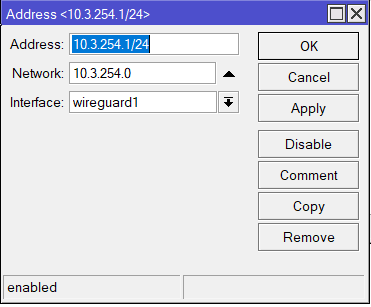
/ip/address add address=10.3.254.1/24 interface=wireguard1Replace 10.3.254.1/24
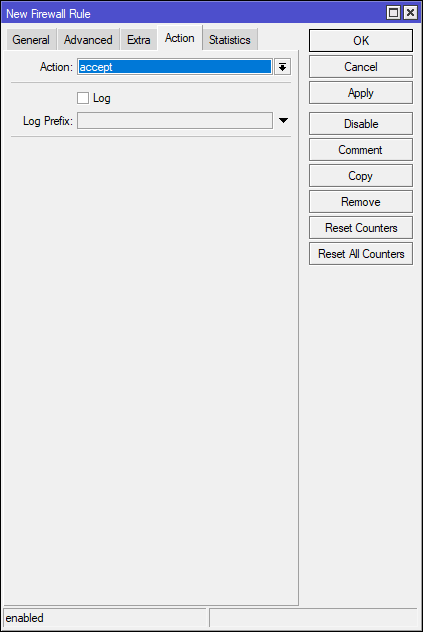
Step 4: Configure Firewall Rules
Input Chain
- Add a rule to accept incoming WireGuard traffic:
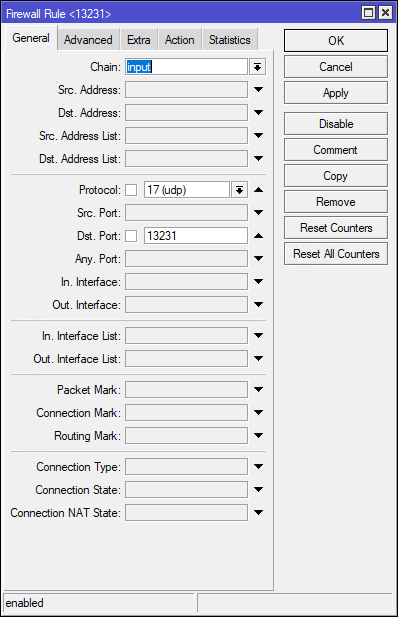

/ip/firewall/filter add chain=input action=accept protocol=udp dst-port=51820Forward Chain (optional)
If you are limiting access between internal LAN subnets, you’ll need to add a rule to allow access between the WireGuard subnet (10.3.254.0/24) to your local subnets. The below example uses address lists for local networks.
Add as many subnets as required
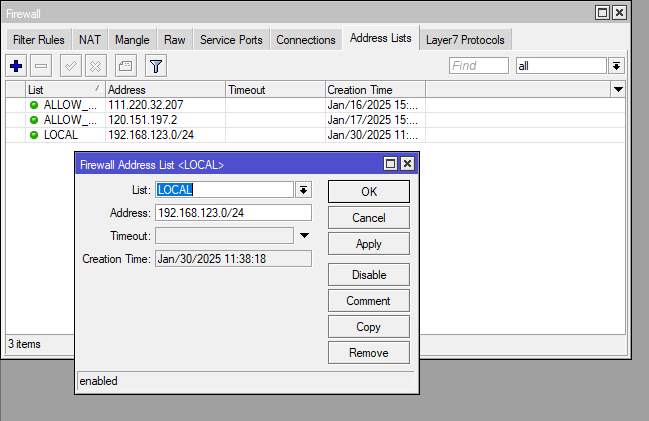
ip firewall address-list add address=192.168.123.0/24 list=LOCAL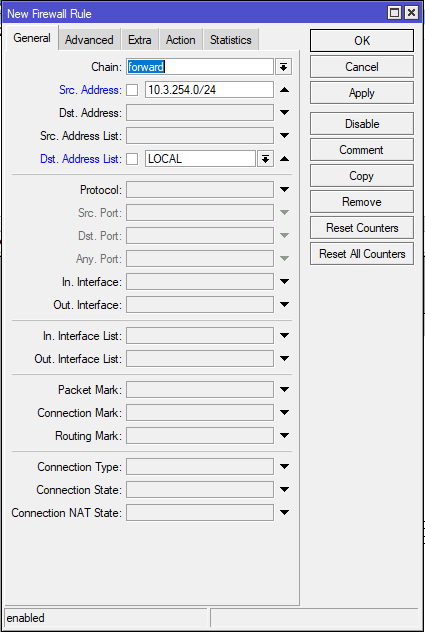
Step 5: Add WireGuard Peers
Each client device connecting to the WireGuard VPN is considered a “peer.”
- Add a peer configuration:
| Name: | wg-user1 | Any name |
| Interface: | wireguard1 | The interface created earlier |
| Private Key: | auto | Set to auto to automatically generate |
| Endpoint Port: | 13231 | Default is 13231 unless changed earlier |
| Allowed Address: | 10.3.254.20 | IP of the client |
| Client Address: | 10.3.254.20 | IP of the client |
| Client DNS: | 1.1.1.1 | Optional (if unset device will use locally acquired DNS) |
| Client Endpoint: | 54.66.163.58 | Public IP of the WG server (the MIkroTik) |
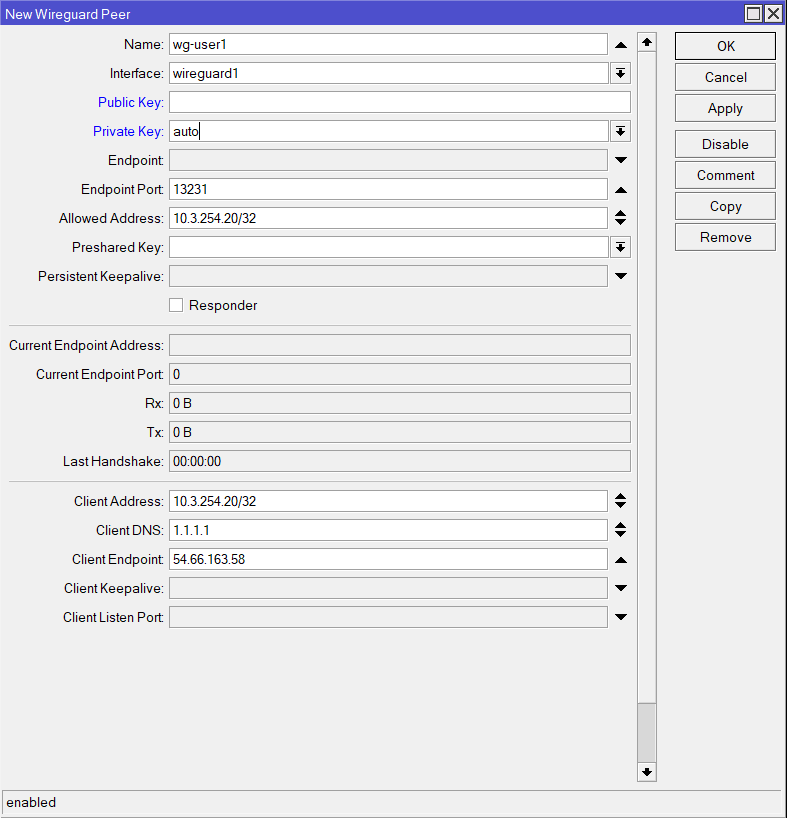
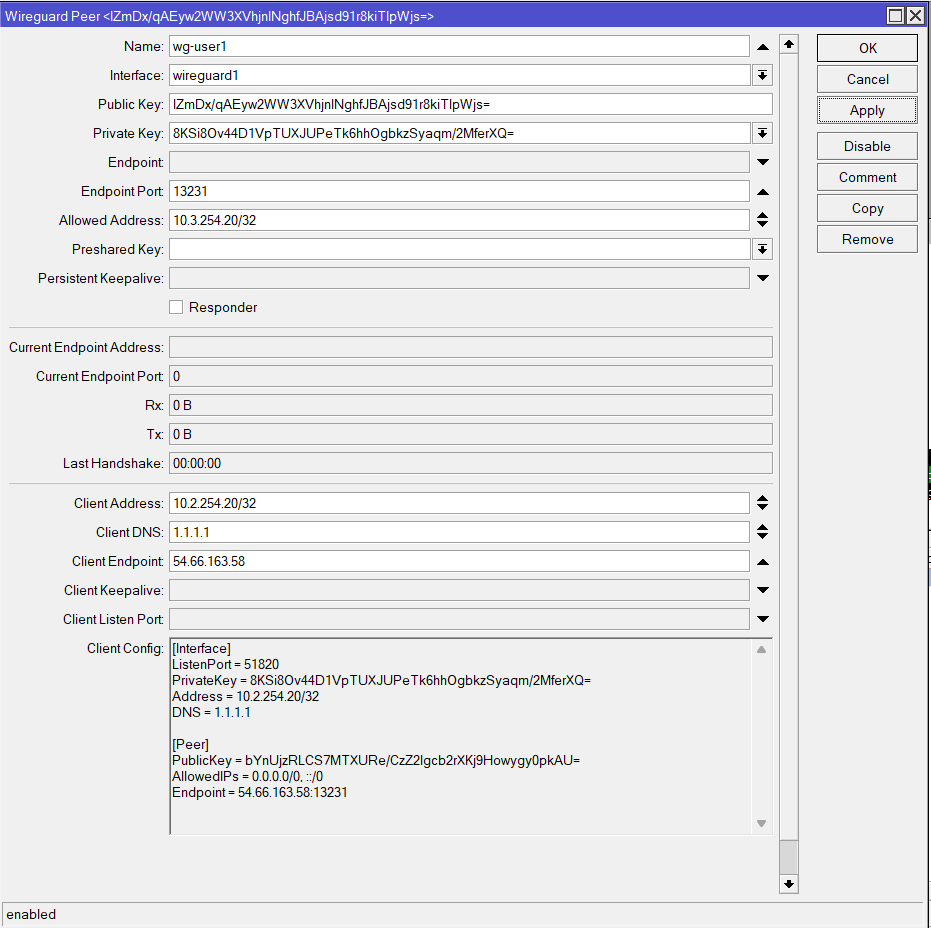
/interface wireguard peers add allowed-address=10.3.254.20/32 client-address=10.2.254.20/32 client-dns=1.1.1.1 client-endpoint=54.66.163.58 endpoint-port=13231 interface=wireguard1 \name=wg-user1 private-key=autoOnce applied the keys will auto-generate and the Client Config will be populated
Repeat this step for each additional client.
Step 6: Configure Client Devices
On the client device (e.g., phone, laptop), install the WireGuard application
The below options are the same on either Windows Client or Phone (Android/iOS) how the look and menu selection will be different but wording will be similar.
Option 1: CONF File
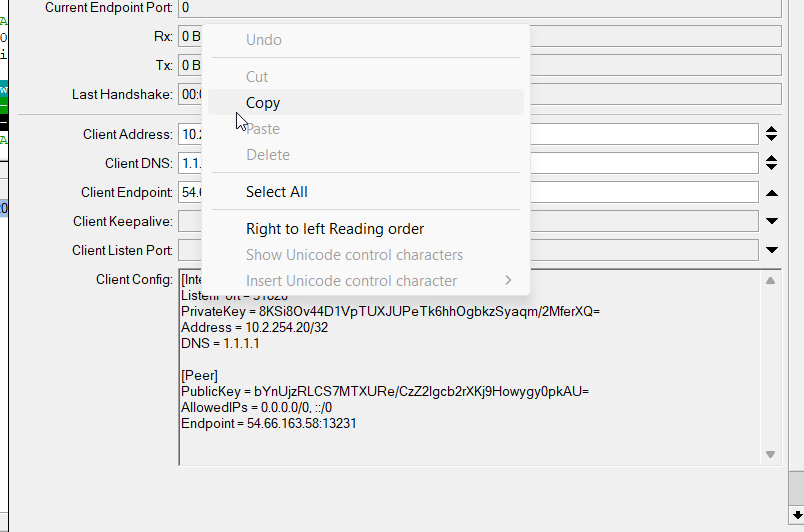
Open a notepad (Windows Notepad or Notepad++) and copy the content from the Client Config under the Peer you created. To do this double click on the content box (it won’t visibly highlight anything) and right-click and select copy:
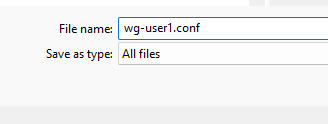
Save the file as a .conf (if using Windows Notepad make sure you change the file type form .txt to all files)
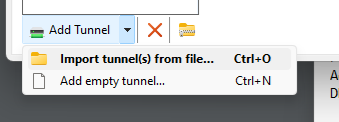
On the Application select Add Tunnel > Import tunnel(s) from file… Then select the .conf file
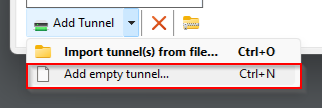
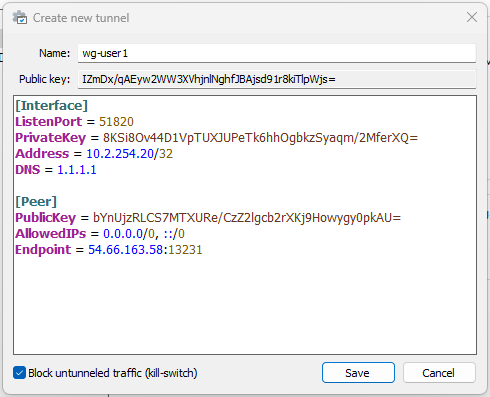
Option 2: Add Empty Tunnel
This option allows you to simply paste the config from the peer settings directly into a new peer connection
Click Add Tunnel > Add empty tunnel… and paste th
Step 7: Verify the Connection
- On the MikroTik router, check active WireGuard connections:
/interface/wireguard/peers print
- Test connectivity from the client device to the internet or internal network resources.
Troubleshooting Tips
- Ensure UDP port 51820 is open on any upstream firewalls or NAT devices.
- Verify the subnet and IP address configurations to avoid conflicts.
Conclusion
WireGuard is a powerful yet straightforward VPN solution that ensures secure and fast communication. By following this guide, you’ve successfully set up WireGuard on your MikroTik router, providing a reliable VPN solution for your network.
If you have any questions or need further assistance, feel free to leave a comment or explore more tutorials on MikroTik Masters. Don’t forget to subscribe to our YouTube channel for more networking tips!


Step 4, is the port really correct? Should it not be 13231?
Agreed – good pickup thanks!
You can choose what you want port number
Yes I believe you can change it to something else
I made it, finally thanks to your guide. Thank you! And what’s most important works for apple products too. yay 🙂